Showing posts with label Ultralight gear. Show all posts

Thursday, August 16, 2018

What's in My Pack for the PCT

As I anxiously watch the air quality index, I figure it's time to get my pack ready in case I decide to go right away on my two-day run southbound on Section J of the PCT. We have had smoke in the Seattle area from forest fires in BC, Canada, and in eastern Washington, and the air quality index was 179 yesterday, classified as "unhealthy for everyone." Yikes. I may decide last minute to go the next day, and I want my pack ready.

Here's what's in my pack:

Note: I changed out #20 for a taller, narrower bottle (same brand). It fits in my front vest pocket better, is still 17 oz., and has a wider mouth so it will be easier to put Perpetuem in it.
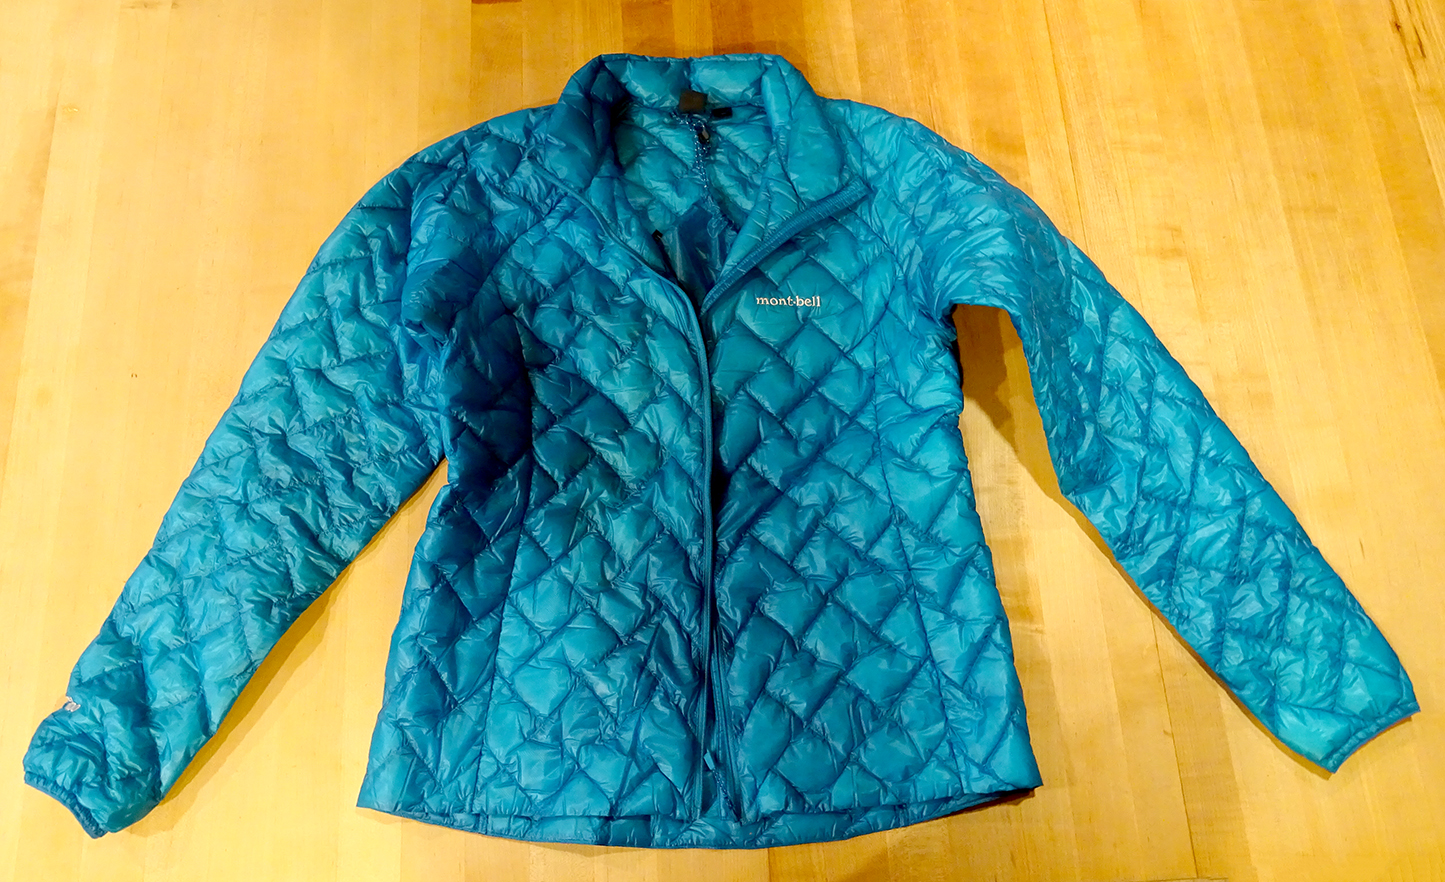
1. Montbell down jacket (for sleeping)
2. Ibex Woolies 3 pants (for sleeping)
3. Bug netting sewed to a headband
4. Sleeve Stars ankle compression sleeve (in case I twist an ankle)
5. North Face Better Than Naked tank top (for changing into to wear under my jacket)
6. Ultimate Direction Fastpack 20
7. Z-Packs down hood (for sleeping)
8. Reflectix (sleeping mat with an R-value of 9)
9. My "tivy" (tent-bivy that I sewed myself with Dyneema waterproof, breathable fabric)
10. Titanium tent stakes (3)
11. DHEA, probiotic, 3 mg time-released melatonin, 15 SPF lip balm, duct tape
12. Trail notes (junctions, water stops, maps of junctions)
13. First aid kit, hydration salts
14. Paper towels and baggie (for pottying)
15. Black Diamond Z-Pole
16. Bear spray
17. Petzl e+LITE headlamp
18. GoPro Session 5
19. Spot Gen3 satellite messenger
20. HydraPak Stow Water Bottle 17 oz (for mixing Perpetuem and Tailwind Recovery in)
21. Katadyn BeFree 20 oz water filter/bottle
22. Ultimate Direction 50-oz bladder
23. Hammer Perpetuem, 6 scoops per bag (2 bags plus one also inside #24)
24. Toaks Titanium 450 ml Cup, Evernew Titanium Alcohol Stove w/ 1 oz alcohol, 6 waterproof matches, nylon cord to hang my food in my pack at night, and Perpetuem inside
25. Tailwind Endurance Fuel (2 bags for 40 oz. and one for 32 oz.)
26. Vega Sport Energizer (for morning of day 2)
27. Tailwind Recovery drink (single serving for end of first day)
28. Vegan trail food: Backpacker's Pantry Spaghetti and Sauce, Louisville Vegan Jerky, Good-To-Go Herbed Mushroom Risotto; GSI Outdoors Essential Spoon
29. Z-Packs 30 down bag and waterproof stuff sack

And here's my pack, fully-loaded:

My pack weighs 8 pounds, 13 ounces without water. My goal was to have it under 8 pounds, and originally, it was 7. But adding things like a first aid kit, lip balm, an extra bag of fuel, and a slightly longer sleeping mat all ads up!

Here's what I'll be wearing for the fastpack:


1. Garmin Fenix 5X and Garmin Forerunner 25 (using Fenix for map both days and distance the second day, and the Forerunner for distance part of the first day)
2. Merrill Agility Peak trail shoes
3. Blue Steel Anti-Chafe Cream
4. Feetures cushioned socks
5. Prescription sun glasses
6. Moving Comfort Crossback Sports Bra
7. Moving Comfort underwear
8. Buff hat
9. Halo headband (has a channel to move sweat to the sides, keeping it out of your eyes)
10. Athleta Sunlover UPF Tulip Back Long Sleeve Top
11. R-Gear Recharge Compression Printed 8" Shorts

In the car for when I finish the fastpack, I will also have supplies. It will include
  • Tailwind Recovery drink
  • Water w/ Vega Hydration Electrolytes
  • Sandwich
  • Wipes (to clean up)
  • Change of clothes
  • Teva sandals
  • Best of all, John (my husband)
The countdown is on and I am getting excited!

Sunday, June 17, 2018

"Tivy" (Bivy/Tent) Project Completed!

On rainy last Sunday afternoon, I finished my "tivy" and I am quite pleased with how it turned out. I had to sew the tabs on the outside to tie the cords to so I can stake it. Then, once I had it staked, I cut the shape of the mosquito netting for the front door. To see the earlier stages of this project, view this post and this one.

Side view of the tivy: I have plenty of headroom and I won't bump the pole in the night.

My finished tivy: I sewed the netting along the bottom and used small strips of velcro on the sides. The pole in the center holds the top of the netting in place.


I sewed the netting onto the bottom of the tivy at the base of the triangular opening, and then sewed on some velcro tabs in three places and it closed up nicely!

I did manage to tear the fabric where the top tab attaches when I was putting the trekking pole in place, so I triple reinforced that part of the tivy. Then it was time for the moment of truth: how much did it weigh? The tivy registered at four and one-eighth ounces! My goal was four ounces. I could probably trim the eighth ounce by trimming the fabric along the seams but I don't want to risk cutting the seams. The thinner fabric is hard to cut, even with brand new sewing scissors.

Then it was time to pack my fastpack vest and see how heavy it was. My goal was to have it weigh seven pounds without water. (My water weight will vary as I go, being able to fill up fairly often, so most likely carrying 20 ounces at a time at most.) With everything packed, my vest weighed six pounds, 15 1/4 ounces. I can probably trim a little here and there by not carrying the case for my headlamp and trimming seams, but I am satisfied.

I weighed my vest on a kitchen scale. At six pounds 15.25 ounces, I am pleased. The bear spray is the heaviest thing in the pack, but I won't go without it!

Friday, May 18, 2018

Making My Own Bivy Part 2

Yesterday, I got started on the actual bivy. The first step was to rip the seams on my sheet-made mock up. Since I used big stitches, it was easy to do. Once I had the seams apart, I laid out each piece and traced them onto tracing paper to make my final pattern. I used a yardstick to ensure straight edges.

Once I had the patterns cut out, I pinned them to the Dyneema fabric. I was dismayed to find that my bottom/side piece of fabric, the heavier of the two Dyneema fabrics, was not quite big enough! However, I had more than enough of the lighter weight fabric that I could sew on that made up the difference. The bonus is that it makes the bivy that much lighter! And really, the sides do not need to be made of the heavier fabric, just the bottom. I pinned the extra strips on and sewed them. 

The pattern sits on top of the Dyneema fabric. You can see how I had to add some of the lighter weight (see-through white) fabric to the sides and bottom of the heavier (dark gray) fabric.

I was super excited to have enough extra lighter weight fabric to add a bit to the bottom to make the bivy longer.
Next, I pinned and sewed the sides together at the bottom, 22 inches up.


Then I pinned the top wedge and foot piece to the lighter Dyneema fabric and cut them out. I pinned one side of the wedge into place and then sewed, being careful to meet the previously sewn seam at the bottom (narrow part) of the wedge. I repeated this process on the other side.

The pattern is placed on the fold of the light weight fabric folded in half. I pinned it, and then cut it out. Next, I unfolded it and pinned it to the main body of the bivy. In this photo, I have the pattern pinned to the lighter fabric and lying on top of the body of the bivy so you can see it. 
Here is the wedge of lighter fabric sewn onto the body of the bivy.
A close up of the spot where the point of the wedge meets the seam in the body of the bivy. I was careful to have all three seams meet.
Then I sewed the foot piece on. That was tricky! I had to ease the fabric into place as I sewed. A slightly oval shape would probably have worked better than a rectangle.

First, I pinned the foot piece into place.

Then, I sewed it into place.


Finally, I sewed two small pockets at the center of the top and bottom of the opening. This will hold the hiking pole and stake the tent.

I hope the pockets will be big enough and strong enough told hold the pole with some tension. If I decide to use a super thin rod to make a half circle, I will remove the pockets and sew a small channel for the rod to slip into instead.

I will still need to sew cords on the sides and top, but they are on order. That gives me some time to decide between using my running pole or a thin, strong strip of plastic we have from curtains of mosquito netting. It would make a nice hoop opening, and I wouldn't have to use a pole at all. But how would I transport it? I also need to add the screen to the front, but I am going to wait until I've decided whether I'll be using my pole or the flexible rod. That would mean a triangle opening or a half circle opening and would change the shape of the screen. Whatever I decide, I will sew the screen to the bottom and then use small pieces of Velcro to secure it on the sides and perhaps some sort of loop to fasten it at the top.

I haven't weighed it yet--I'll wait until I get everything attached--but wow, it's like a potato chip bag! I got inside it and I have plenty of coverage over my head. Had I not added the strip at the bottom, I think it would have been a little short.

Update: I just weighed it and it's 3.75 ounces! It still needs the mesh on the front and I've decided it only needs one cord at the top. My body will hold the rest of it down. If it weighs in above 4 ounces when these things are added, I'll trim the seam selvage edges.

Thursday, May 17, 2018

Making My Own Bivy Part 1

In an effort to keep my running vestpack as light as possible, I decided to make my own bivy. I ordered two kinds of waterproof, breathable fabric from Z-packs: 1.0 oz/sq yard Dyneema Composite Fabric, which I am using for the bottom and sides, and .34 oz/sq yard Dyneema Composite Fabric, which I am using for the top. While I am anxious that I will be cold after running all day, being sweaty, and perhaps not having enough food to keep me warm, I think the more of the heavier fabric I use, the warmer I will be. I am always cold after my long runs, so I can only imagine I will be cold the night of my fastpack.

This is a quick sketch of my basic idea and shape. The upper right shows a mini version in profile, whereas the main image is looking straight down at it.

I decided to make the bivy out of an old sheet at first, rather than cutting into the costly fabric. You could also use cheap muslin. I spread the sheet out on the floor and then put my sleeping bag on top. I then folded the sheet over it with a little extra on the sides, knowing that my body inside the bag would mean the bivy would need to be a bit bigger than an empty sleeping bag. I wanted the shape of the bivy to taper with the sleeping bag, so at the bottom, the fabric meets, but toward the top, there is a gap of about ten inches. I made marks on the sheet with a Sharpie and fashioned a pattern out of butcher paper using those marks once I unfolded the sheet.

I first folded the bivy fabric over my sleeping bag and then traced the shape onto my butcher paper. I cut the sheet to the size of my piece of 1.0 oz/sqyd Dyneema Composite Fabric, which is 2 yards, and then used my butcher paper pattern (on top of the sheet in this photo) to cut the sheet to the right shape. I made the pattern half the total shape so I could fold the sheet and only have to cut once. The sheet is unfolded here so you can see the overall size. The pattern is folded to show where the fold will be when I sew the edges together.

Here, I've sewn the edges together. The seam only goes 22 inches up. The remainder is open in a triangle. The top of the triangle is 20 inches wide. That's where the lighter weight fabric will be sewn.

I made it about six inches longer than my sleeping bag, and when I get in it, I have just enough room--with my feet against the bottom end, my head is just under cover. The 1.0 oz/sq yd DCF is only just long enough for this, so if I want to make it longer, I can only do so if I happen to have enough scrap from the width--or use of the lighter .34 0z/sq yd DCF. At any rate, if I can't add any length, the bivy will at least be lighter.

I opted for a width that is just a bit wider than my sleeping bag. Essentially, it is a shell for my bag that will hopefully keep me warm and dry. The bivy is 22 inches wide at the bottom and 40 inches wide at the shoulders. The length is 72 inches. I am five foot seven inches tall and 130 lbs with a slender build.

I then sewed the sheet together using large stitches (5.0 for stitch length) along the bottom where the sheet meets, cutting much of the excess fabric off (but not too much in case I needed to make it wider). I used large stitches so that they would be easy to take out if I needed to make the bivy larger. I then cut a piece to represent the lighter fabric in a triangle shape (twice as wide as needed to allow for staking the top above my head) that I sewed into the gap. I also cut a small rectangle to sew onto the bottom to close it up that is five and a quarter inches by 19 and a quarter inches.

The third number on my machine is the stitch width. I used the widest stitch so they would be easy to take out if I made a mistake. Also, in the end, I'll take the whole thing apart to make a final pattern.
I then got inside and used my running pole two-thirds put together to stake the middle while my husband pulled the sides taught. I had him mark where he pulled it tight so that I can attach cords there. I also had him mark where my pole was so I can sew a little pocket on top and bottom to tuck the pole into place. I will also need to attach a cord on the top to keep the pole upright but staking it outward as well.

I held my hands to pull the fabric tight at the bottom and my husband mark those spots. When I make the real bivy, I'll attach cords here. The pole will need a pocket to hold it in place on top and bottom.

This is the top view from the back. Pretty small bivy. With no zippers and minimal fabric, it should be light!

When I make it out of the Dyneema fabrics, I'll make a mesh screen triangle for the front of the bivy. I will sew it to the bivy on one side, and then Velcro it to the bottom and the other side. I think that will be the only way to do it and still be able to get inside.

The next step will be to take the sheet bivy apart so that I can use the fabric to make a new pattern before I cut into the real fabric. My original pattern is a little bit big. I didn't have to resew anything, but I noticed that there was too much fabric before I even began sewing.

Please note that all dimensions are finished dimensions. When cutting out fabric pieces, you'll want to add a 5/8 inch minimum seam allowance to any side of the fabric that will have a seam. That means the triangle will be an inch and a quarter wider, for example, to accommodate the seams.

PLEASE SEE PART 2, when I make the real thing!

Sunday, January 7, 2018

Ultralight Gear Update

Since my earlier post on the gear I will be taking on my August 2018 fastpack, I have changed my mind on a couple of things. I have found a super light headlamp (which I updated already on the previous post), I've discovered alcohol fueled ultralight stoves, and I've found down jackets lighter than my Woolies 3 top. Between the light and the jacket, I've been able to shave 8 ounces, and I am pretty sure my tiny stove and fuel are going to weigh in less than that! Plus, I figure I'll have to carry around freeze dried food with 2 cups of water in it for hours and hours, waiting for it to hydrate, and the water weight may just be the same as the stove. When it arrives, I'll compare and spill all the details below.

Four days later...

First, the stove, denatured alcohol fuel, and titanium cup. Together inside a bright orange stuff sack (which I think I will use just to keep everything together), they weigh 8 oz. A cup of water weighs 9 oz. I figure if I don't take the stove and rehydrate the food with cold water, I will have to let it soak for half a day, which means I'll be carrying 9 oz around most of the time when I am running. In that case, I may as well carry a stove set up and have hot food!

The titanium cup is made by Toak and the alcohol stove is the Trangia Spirit Burner with Screw Cap. 

The stove fits nicely inside the cup, which I will use to boil water. The handles are collapsible.

Five days later...

Now for the jacket. I decided on the Montbell Plasma 1000 Down Women's Jacket. It's 3.1 ounces! It doesn't have a hood, but I have a 1.3 oz. hood from ZPacks. Wow! The jacket sounds like a cellophane bag, but it's warm and light, just as I wanted. It has minimal features--just a zipper. No pockets, as they would add weight. It comes with a tiny stuff sack, which may be helpful to contain it in my minimalistic pack.


Once I've had a chance to sew my tivy (my bivy-sized tent), I'll pack the pack and weigh everything. Stay tuned!

Training for a 75-mile Fastpack in Retrospect

I've had considerable time to process my training for and run on Section J of the PCT this past August. My return to a normal running sc...